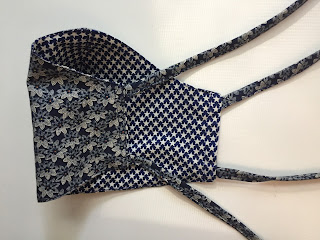
Melissa's contoured mask
Here is my sister in law Melissa's mask design, which was originally based on the pattern and instructions here.
 |
| Here are some examples Melissa made |
 |
| Here is a mask I made using Melissa's instructions |
Here is Melissa's version of the pattern.
Instructions
Here is how I made the mask, based on Melissa's instructions.1. Cut out four pieces, with straight edge on grain: two for outside (shell), two for lining.
3. Clip seam with notches.
7. With fingers, fold & turn raw side edges to inside (between shell and lining). Press.
8. Now attach ties. Here are some options. I made fabric ties from bias tape, for ties around the head.
9. You may have bias tape or ribbon, or you can make it, as I did in this case.
10. Cut four ties about 18-20" each, and insert one end into each of four corners of mask, angling the top corners slightly upward. Top stitch close to side, through ties and mask, continuing around entire mask. Top stitch again on sides through ties, 1/4" away from original topstitching.
11. Voila!
Nose Wire
I did not put a nose wire into this mask, as I found my glasses on top of it pressed it tightly to my nose. Here is now Melissa told me she inserts wire:
"Before turning it right side out and finishing the bottom edge, I have been putting a length of gardening wire in the top edge seam allowance. Basically, I make a channel in the seam allowance using a tight zigzag stitch along the raw edge, through which I thread approximately 6” long piece of wire with 2 eyelet ends. The eyelet end I tack in place with a bit of zigzag in place."
(There are also video instructions here)
(There are also video instructions here)


Comments
Post a Comment