How to make my contoured cloth mask.
 |
| This is the finished mask, with nylon ties. |

(For the LARGE pattern, both edges are convex.)


4. Put lining inside shell, WRONG sides together, lining up center seam stitching.
5. Zigzag around the outer edges, then trim as necessary so that all edges line up.
6. Make two small pleats on bottom (flat) edge. Pinch with your fingers and zigzag on top to hold in place.

7. Turn right side out. Hold against face to test for size. Make sure you can move your jaw.

9. Turn right side out. That's better.


Now you can skip to binding, or make sleeve for nose wire first. (The nose wire will keep eyeglasses from fogging up.)
Sleeve for nose wire
10. To make sleeve for nose wire, cut a scrap of fabric about 3.5" long and 2.25" wide. Press under short ends 1/4" and zigzag in place.


12. Stitch to top of mask just below peak.


Binding
13. Now bind the outer edge of mask with 2" bias strip, folded lengthwise (about 15" long).If you don't have bias strips, you can make them easily from scrap fabric.


 |
| ends of bias tape joined with a seam |


18. Use a piece of pipe cleaner, folded in a long U, with ends pinched to avoid sharp edges. (Remove pipe cleaner when washing mask.)

cut and fold pipe cleaner; be sure to pinch ends 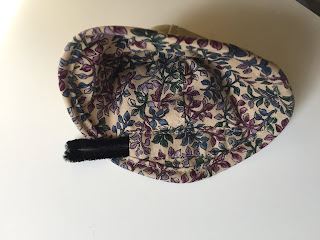
insert folded end into sleeve. 


Adding Ties or Elastic
19. Now add ties or elastic at four points around the edge. (Elastic is hard to find these days, and it can hurt your ears, so I use ties).Elastic option 1:
one loop around each ear, about 8" x 1/8" elastic (as in my original example).
Elastic option 2:
two longer loops around back of head (one above ears, one below ears).
Here I've used two nylon headbands (softer than elastic). Zigzag ends to inside of binding.

Here I've used two nylon headbands (softer than elastic). Zigzag ends to inside of binding.
 |
| Mark four corners with pins, for placement of ties |
Fabric Ties:
Use bias tape stitched into ties, or ribbon, or string. Sew two 20" lengths at top points, and two 16" lengths at bottom points. Zigzag stitch through binding.


Comments
Post a Comment